Explaining you how to use an Auto-It script for Reverse Enigneering that i wrote.
(Explaining this for Domestique Trader but it will also work for Munitions
and Engineering Trader)
Step I: Preperation
First you should get yourself a nice REing Equipment (Armor and clothing pieces
with luck as high you can get + shirt, chestplate and weapon with RE chance and
luck) also get yourself weapon, breastplate and shirt pups with high RE chance
value.
You also need:
- !!Some time and patience to get all this working!! it is very complex and I'm not sure if i can make you understand...
- 2 RE tools. one can have bad quality as it'll only be used for making Modifier Bits.
- a good amount of 2 different junk pieces (1000 of each should be enough at the beginning. The more you have the lesser often you'll have to put new junk into RE tool)
- (optional) any food/stims with high luck you can get.
- a backpack full of crates of clothing that has sockets (I myself am using Simple Shirts).
if you got all these things put them into your inventory. (the 2 junk pieces have to be in the low qaulity RE tool.
Getting Auto-It v.3:
If you dont have Auto-It v.3 yet you can download it at
http://www.autoitscript.com/autoit3/downloads.php
Install it and proceed to Step II.
Step II: Adjusting the Script
Note: if you are running swg in windowed mode you have to change setting in launchpad before adjusting. go to game options -> Graphics and make a tick at Borderless Window.
Here is the Script:
Code: Select all
; RE Script by swg_xploiter
Global $Paused
HotKeySet("{ESC}", "Terminate")
Opt("MouseClickDragDelay", 100)
Sleep (5000)
While 1
;Power Bit Into RE tool:
MouseClickDrag ( "left" , XA, YA, XB, YB, 1) ;Enter X and Y coordinates of Point A and B
Sleep (700)
;Modifier Bit Making:
MouseClick ( "right" , XC, YC, 1 ) ;Enter X and Y coordinates of Point C
Sleep (500)
MouseClick ( "right" , XD, YD, 1 ) ;Enter X and Y coordinates of Point D
Sleep (1000)
;Modifier Bit Into RE Too:
MouseClickDrag ( "left" , XA, YA, XB, YB, 1) ;Do same thing as in line 11
Sleep (700)
;Shirt out of crate:
MouseClick ( "left" , XE, YE, 3 ) ;Enter X and Y coordinates of Point E
Sleep (500)
;Creating CA:
MouseClick ( "right" , XB, YB, 1 ) ;Enter X and Y coordinates of Point B
Sleep (500)
MouseClick ( "left" , XF, YF, 1 ) ;Enter X and Y coordinates of Point F
Sleep (1000)
;CA Onto Shirt:
MouseClickDrag ( "left" , XH, YH, XA, YA, 1) ;Enter X and Y coordinates of Point H and A
Sleep (700)
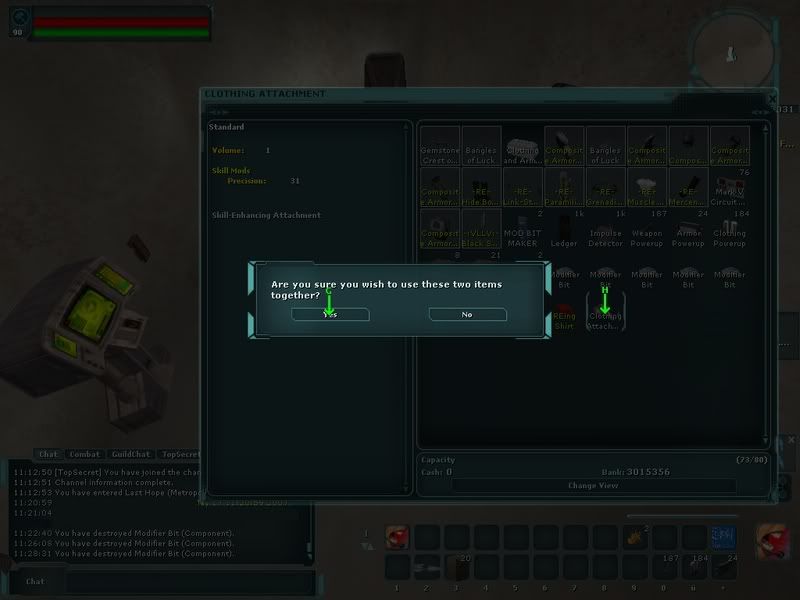
;Confirming CA Onto Shirt
MouseClick ( "left" , XG, YG, 1) ;Enter X and Y coordinates of Point G
Sleep (500)
;Shirt Into RE Too:
MouseClickDrag ( "left" , XA, YA, XB, YB, 1) ;Do same thing as in line 11
Sleep (700)
;Reverse Engineering:
MouseClick ( "right" , XB, YB, 1 ) ;Enter X and Y coordinates of Point B
Sleep (500)
MouseClick ( "left" , XI, YI, 1) ;Enter X and Y coordinates of Point I
Sleep (1000)
WEnd
Func Terminate()
Exit 0
EndFunc
copy it into an .au3 file that you can create by rightclicking on your desktop or on a folder.
once you copied the Script will be shown in different colors. the green messages are notes that will tell you which mouse coordinatios you will have to put in.
in the following screenshots you will see how your interface has to look like for REing (i added points from A to I. you will need to take screenshot and see where the points are and exchange them in the script. XA and YA for example in my screenshot are 722 and 401 (I'm using MS paint to get the coordinations but there are other ways)
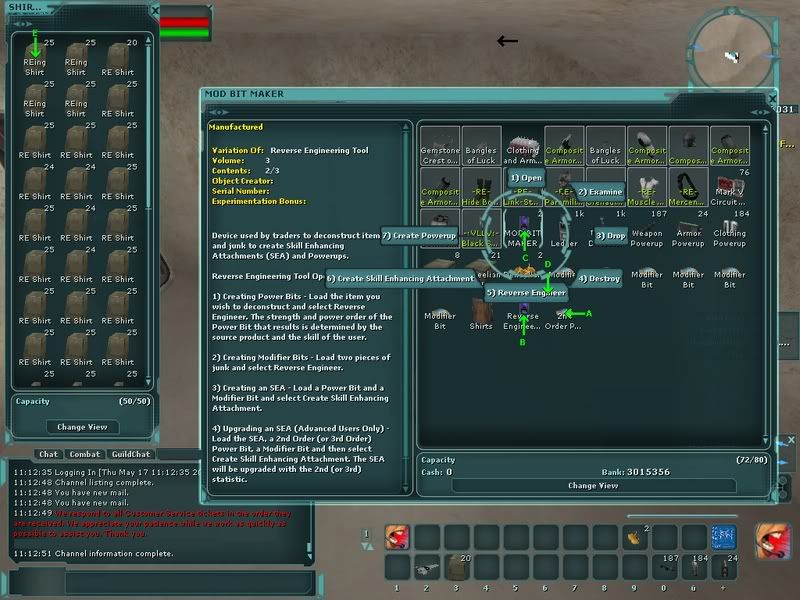
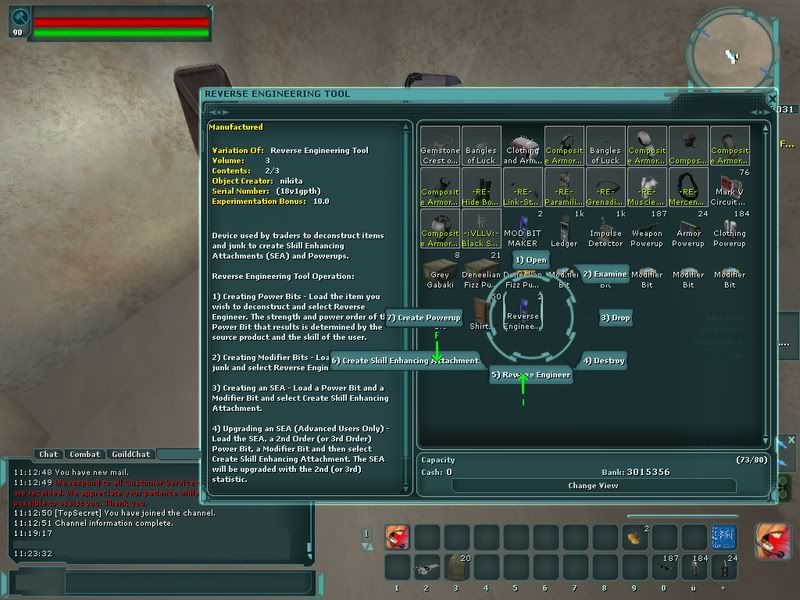
as you can see in the images you will have to have the inventory + the backpack window open for REing. and it's important that the power bit is at the last spot in the inventory. (it is better if the inventory hasnt gotten too much stuff in it).
Step III: Using Script
After you adjusted the script save it and start it. you then have 5 seconds to toggle to swg client. then it should start with grabbing the power bit into the RE tool. if you want it to stop press the escape key.
if you have problems setting this up let me know and i'll try to explain it a bit further.


 Who is online